07/12/17
When it comes to showing your personality and reflecting your unique sense of style in your bathroom – and, indeed, any room in your home – a gallery wall is the perfect way to achieve this. A gallery wall is a collection of artworks grouped together, either in a uniform framework or a more haphazard manner, on a single wall. Originating from 17th-century France, where this salon-style trend was a way of bringing art to the masses, it has continued to be a popular method of displaying favourite pieces of artwork up to the present day.
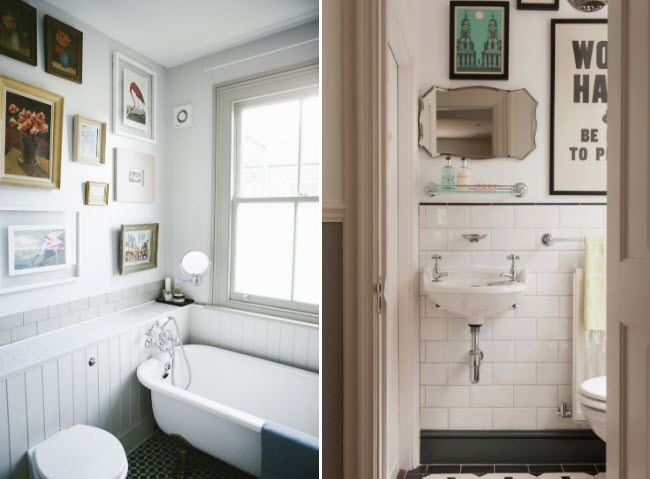
{images via Remodelista}
Although it certainly looks impressive, it can be a daunting task to figure out how to go about building up a gallery wall collection and then hanging it. Thankfully, our friends at Rise Art – home to a fantastic range of affordable online art – are on hand to give us an easy step-by-step tutorial. And then finally, we’ve pieced together an example gallery wall in the hopes it will inspire you to create your own…
Step 1: Show your personality
A gallery wall should echo your personality and your taste in art, so it’s a joy to look at every day. Pick a loose theme or colour palette, to avoid any pieces that look out of place and jarring, and stick to it as much as possible. And don’t be afraid to be bold with your framing. If you have a series of works from one artist, identical frames are a good choice, especially if you’re hanging in a grid-style. For a more diverse collection with mixed materials (paintings, photography, typography, etc), vintage or second-hand frames can be a fun way to highlight the eclectic nature of the gallery wall.
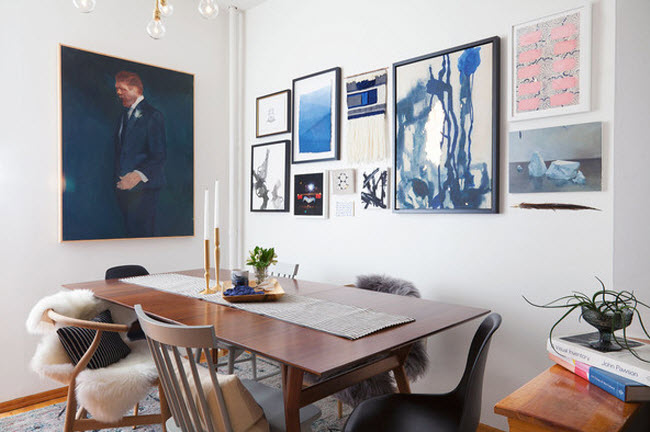
{image via Genevieve Garruppo}
Step 2: Lay it out
Once you’ve chosen your artwork, measure your chosen space – twice or three times, if necessary – to make sure all the pieces will fit in the area you wish to cover. Then lay out your framed works on the floor, and rearrange until you’re happy with the final composition. To be extra sure, cut out paper to the size of each piece and attach them to the wall. Take a step back and check that it’s at the right height compared with nearby pieces of furniture or fixtures and fittings. And remember to get a second opinion – a fresh pair of eyes can be very useful.
Step 3: Start big
Always start with the largest item first to create a focal point. Placing it slightly off-centre is recommended, to give it a slightly more relaxed configuration. Of course, if you’re hanging in a grid-style, this won’t apply. Ensure any particularly striking or bright colours are distributed equally throughout your hang, and maintain equal spacing between pieces working from the centre outwards. The final collection should appear balanced, whether it’s symmetrical or not.
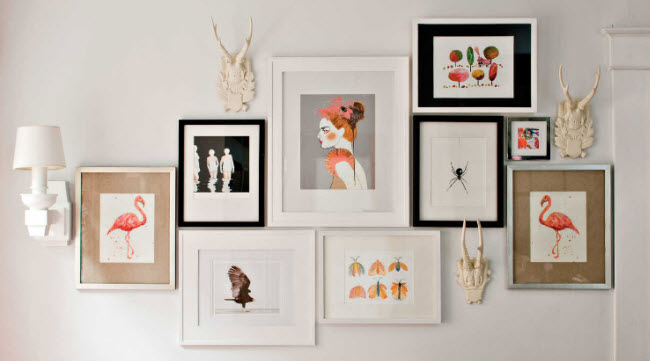 {image via Southern Living}
Step 4: Hang with precision
Now you’ve laid out your artwork, it’s time to add your personality to your blank wall. A few general rules to consider:
· Space your artworks at least 3cm (1.25 inches) apart to make sure each piece stands out on its own.
· Hang your focal artwork with the centre of the piece at 150cm (59 inches) from the floor, so it’s at eye level.
· Use a spirit level and the mark the wall with a pencil before drilling any holes.
· Double and triple-check your measurements.
· Then start hanging.
Create a gallery wall with Rise Art
And here's one we made earlier! Using a palette of blues, greens and pinks, our gallery wall also references the great outdoors:
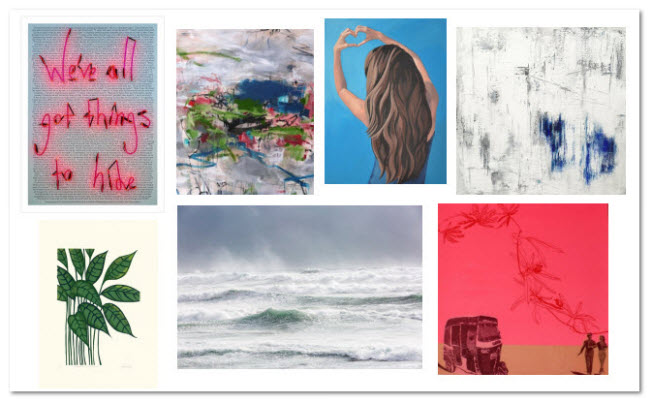
{clockwise from top left: Rebecca Mason // Daniela Schweinsberg // Julia Blackshaw // Helen J Young // Anna Marrow // Nick Miners // Kerry Day - artwork not to scale}